Save invoices to your Google Sheet and reload them anytime.
Saving a Transaction
- Complete your invoice with line items
- Click Save button in the action bar
- Transaction is saved to your configured saving sheet
- Auto-assigned a sequential transaction ID
- Tab status changes from “Draft” to saved number
💡 Note: You must configure a saving sheet in Invoice Settings before saving. If not configured, you’ll be prompted to set it up.
Loading a Saved Transaction
- Click the 📂 Load button (next to + tab button)
- Search saved transactions by ID, date, type, or description
- Click any row to load
- Transaction opens in a NEW tab
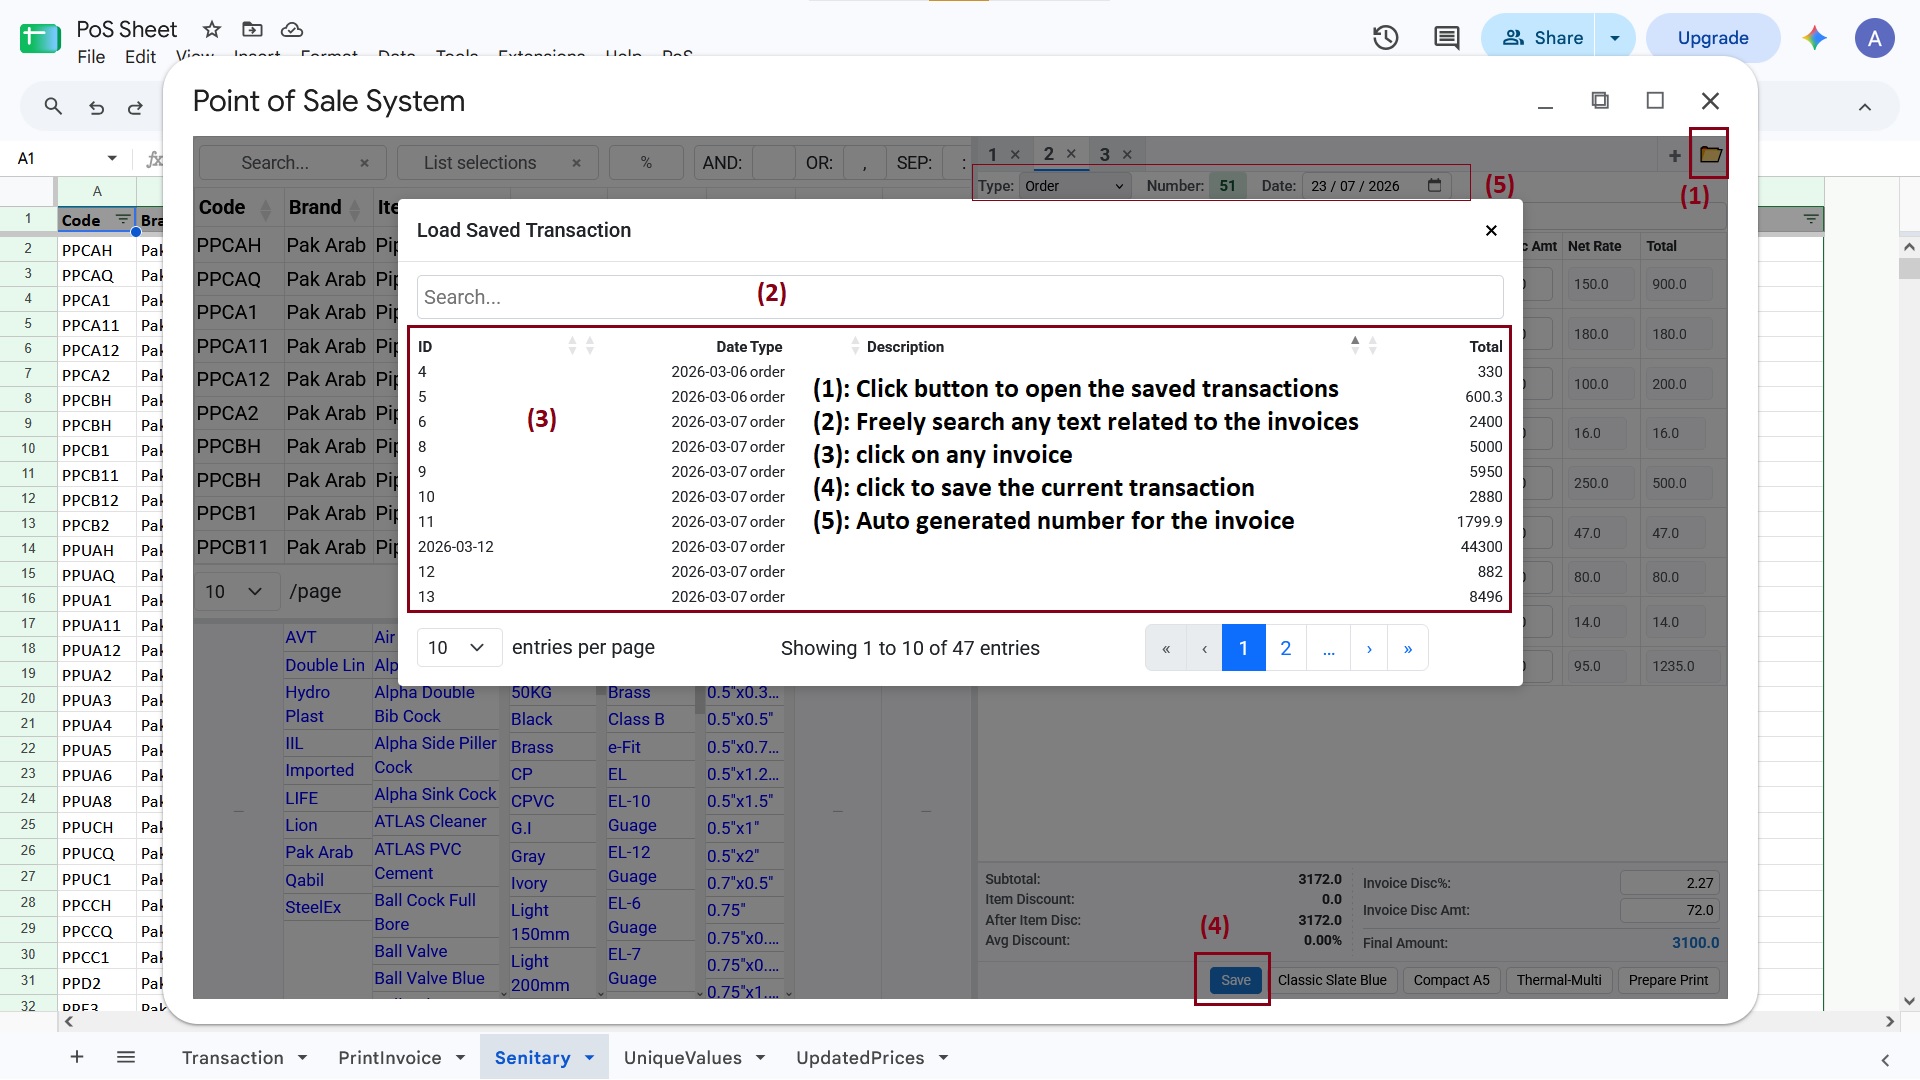
Loading saved transactions in SheetERP POS Invoice
Transaction IDs
Each transaction receives a unique sequential ID. You can customize the ID source in Invoice Settings:
- Auto-increment: System generates sequential numbers
- Custom: Use your own column as ID source
Where Transactions Are Stored
All transactions are saved directly to your Google Sheet (the one you configured in Invoice Settings). Each saved transaction becomes a row in your saving sheet. You can view, filter, and analyze transactions using Google Sheets’ native features.
Next: Learn about Printing Invoices with HTML Templates.