Learn the basics of SheetERP POS Invoice — interface overview, opening the dialog, and understanding the layout.
Opening the POS Dialog
After installation and configuration, open the POS interface by going to:
Extensions → SheetERP → Open POS
Understanding the Interface
The POS interface is divided into two main panels:
Left Panel: Search & Select
- Search Bar: Type to filter products
- Results Table: Click any row to add to invoice
- List Panel: Browse unique values per column
- Discount Control: Apply global discount to all products
Right Panel: Invoice Builder
- Tabs: Work on multiple invoices
- Header: Type, number, date, details
- Items Table: Line items with calculations
- Summary: Subtotals, discounts, final amount
- Action Bar: Save, print, prepare print buttons
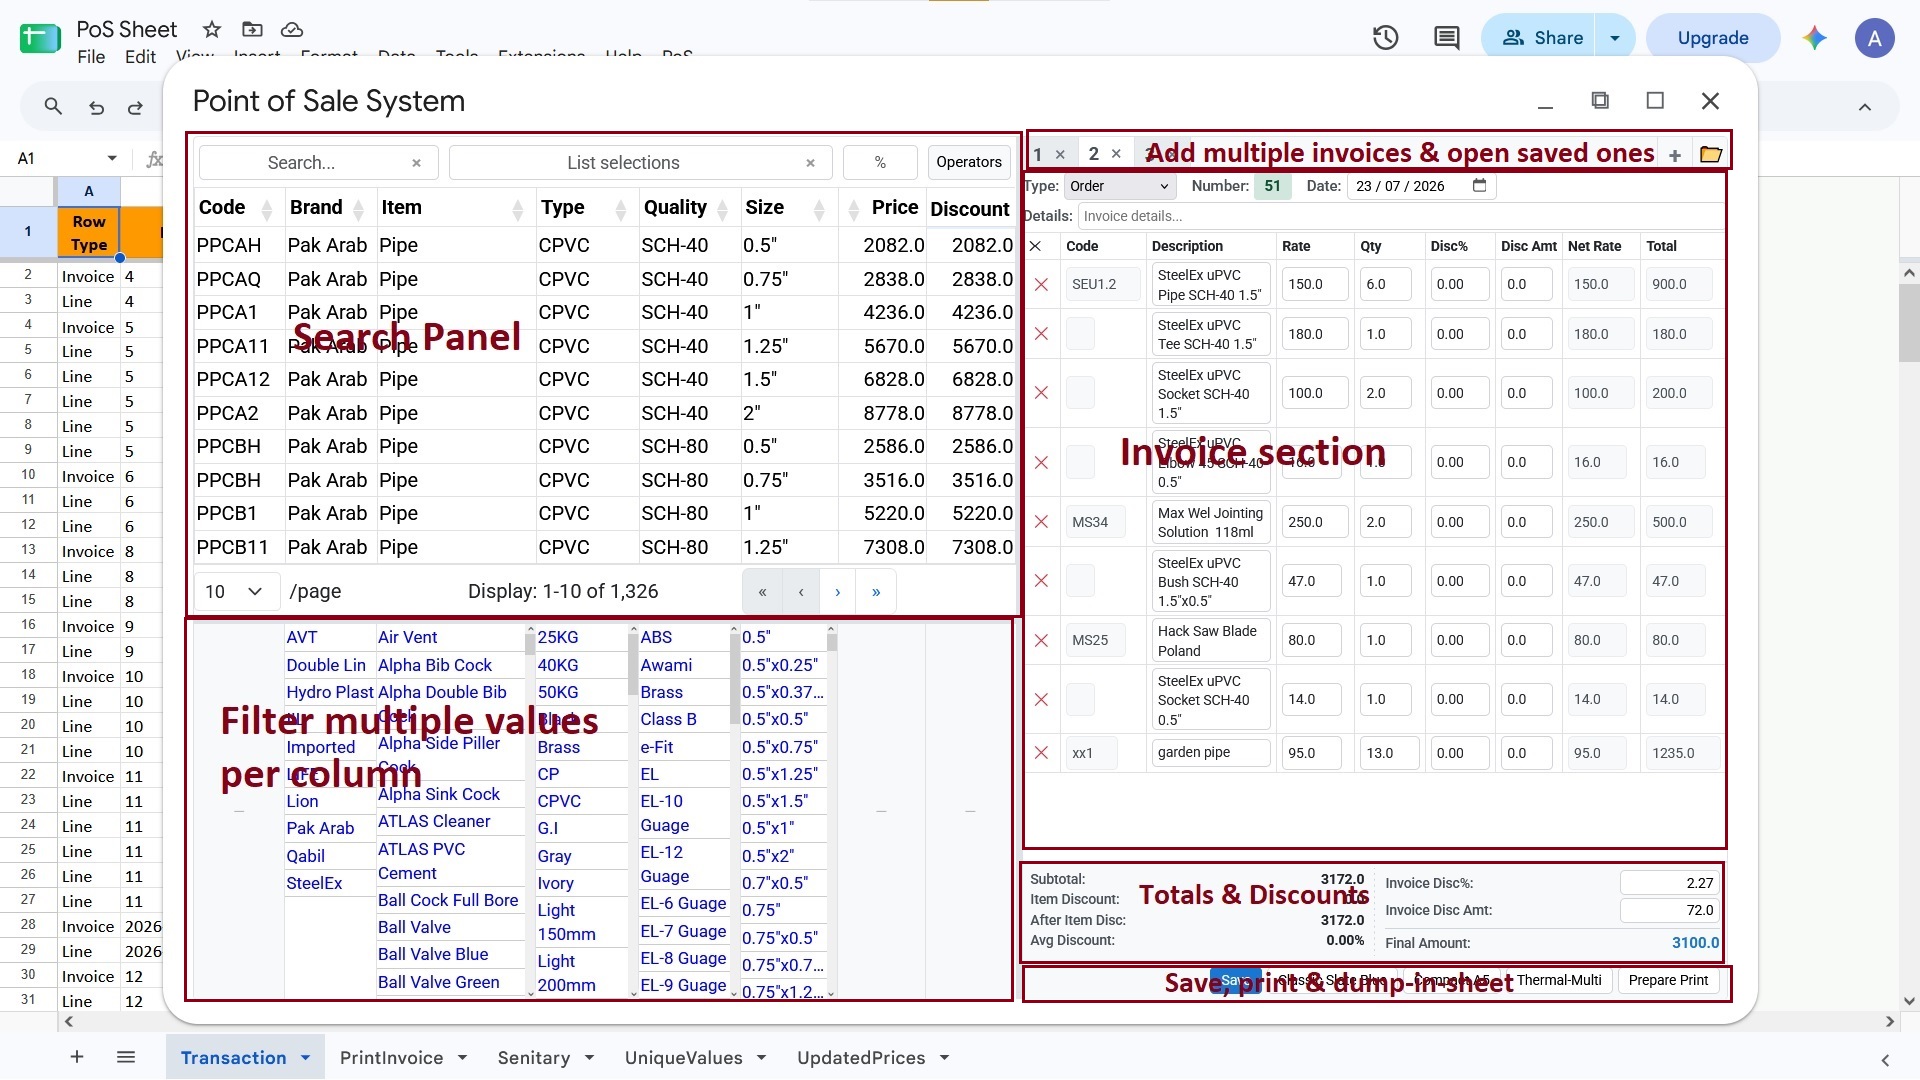
SheetERP POS Invoice dual-panel interface
Adjusting Panel Sizes
You can resize panels by dragging the dividers:
- Vertical divider: Between search panel and invoice panel (drag left/right)
- Horizontal divider: Between search table and list panel (drag up/down)
Panel sizes are saved automatically and restored next time you open the POS.
💡 Tip: If you haven’t completed the installation and setup, check out the Installation Guide first.
Next: Learn how to use Search Operators to find products faster.